Chcesz trwale połączyć dwa elementy? Same dobre chęci nie wystarczą. Najpierw dowiedz się z naszego poradnika, jak lutować, a następnie zaopatrz się w odpowiedni sprzęt. Wszystkie niezbędne informacje o technikach i rodzajach lutowania znajdziesz w naszym artykule. Dowiesz się też, co kupić, aby w ogóle zacząć lutować.
Chcesz trwale połączyć dwa elementy? Same dobre chęci nie wystarczą. Najpierw dowiedz się z naszego poradnika, jak lutować, a następnie zaopatrz się w odpowiedni sprzęt. Wszystkie niezbędne informacje o technikach i rodzajach lutowania znajdziesz w naszym artykule. Dowiesz się też, co kupić, aby w ogóle zacząć lutować.
Albo jedno, albo drugie, czyli rodzaje lutowania
Najpierw trochę teorii. Podstawowa definicja mówi, że lutowanie to metoda łączenia metalowych elementów przy użyciu spoiwa, czyli lutu (nazywanego też lutowiem). Podczas procesu przeprowadzanego we właściwej temperaturze, o której dowiesz się później, lut się topi. Łączone elementy pozostają natomiast w stanie stałym.
Teraz możesz zapytać „to, czym się różni lutowanie od spawania?”. W końcu i tu, i tu masz wysoką temperaturę, spoiwo i metalowe elementy, które obrabiasz. Tak, ale w przypadku spawania temperatura jest tak wysoka, że dochodzi do stopienia krawędzi spawanych części, a nie tylko samego spoiwa.
Kiedy znasz już główną zasadę, przyjrzyj się rodzajom opisywanej techniki. Nie jest ich dużo, bo zaledwie dwa:
- lutowanie twarde (powyżej 450°C),
- lutowanie miękkie (poniżej 450°C).
Zapewne już się domyślasz, że kwestia, jak lutować zależy od temperatury. Właśnie ona stanowi wyznacznik różnic. Poniżej znajdziesz dokładną charakterystykę lutowania twardego i miękkiego.
Lutowanie twarde
Lutowanie twarde to ściśle mówiąc lutowanie przy użyciu spoiw lutowniczych o temperaturze topnienia powyżej 450°C, tzw. lutów twardych. Ze względu na podstawowy składnik lub składnik wywierający zasadniczy wpływ na właściwości luty twarde dzieli się na:
- luty miedziane i na osnowie miedzi,
- luty srebrne i na osnowie srebra,
- luty na osnowie złota,
- luty na osnowie platyny,
- luty na osnowie palladu,
- luty na osnowie aluminium,
- luty na osnowie magnezu,
- luty na osnowie niklu,
- luty na osnowie manganu, kobaltu i żelaza,
- luty na osnowie tytanu, wanadu, cyrkonu i hafnu.
Stworzone tą techniką połączenie lutowane charakteryzuje się dużą wytrzymałością. Sprawdza się w przypadku stali węglowych, molibdenowych, wolframowych, chromowych, niklowych, płytek z węglików spiekanych, ale również złota, srebra, brązu i mosiądzu. W przypadku lutowania miedzi sprawdza się zarówno lutowanie twarde, jak i miękkie.
Do lutowania twardego konieczne jest użycie palnika propanowo-tlenowego lub acetylenowo-tlenowego. Jest to droższy sprzęt i wymagający większych umiejętności oraz doświadczenia niż lutowanie miękkie. Stawiasz pierwsze kroki w naprawach urządzeń, pracach monterskich czy nawet w domowym majsterkowaniu? Z pewnością przyda Ci się wiedza z kolejnych części naszego poradnika.
Lutowanie miękkie
Zatem czym jest lutowanie miękkie, skoro nie musisz mieć dużego doświadczenia ani budżetu na przemysłowy sprzęt? Jest to lutowanie, które odbywa się w zakresie temperatury nieprzekraczającej 450°C. Lut wymaga niższej temperatury do stopienia niż w przypadku lutowania twardego. Zwykle w spoiwach stosuje się stopy z zawartością takich pierwiastków jak bizmut, cyna, kadm i antymon.
Metoda jest uniwersalna, ponieważ umożliwia naprawy układów elektronicznych, lutowanie przewodów elektrycznych oraz łączenie blach (np. w konstrukcjach dachów, rurociągów, zbiorników). Lutowanie miękkie zdaje egzamin w łączeniu miedzi, cynku, stali i innych stopów.
Podstawy lutowania
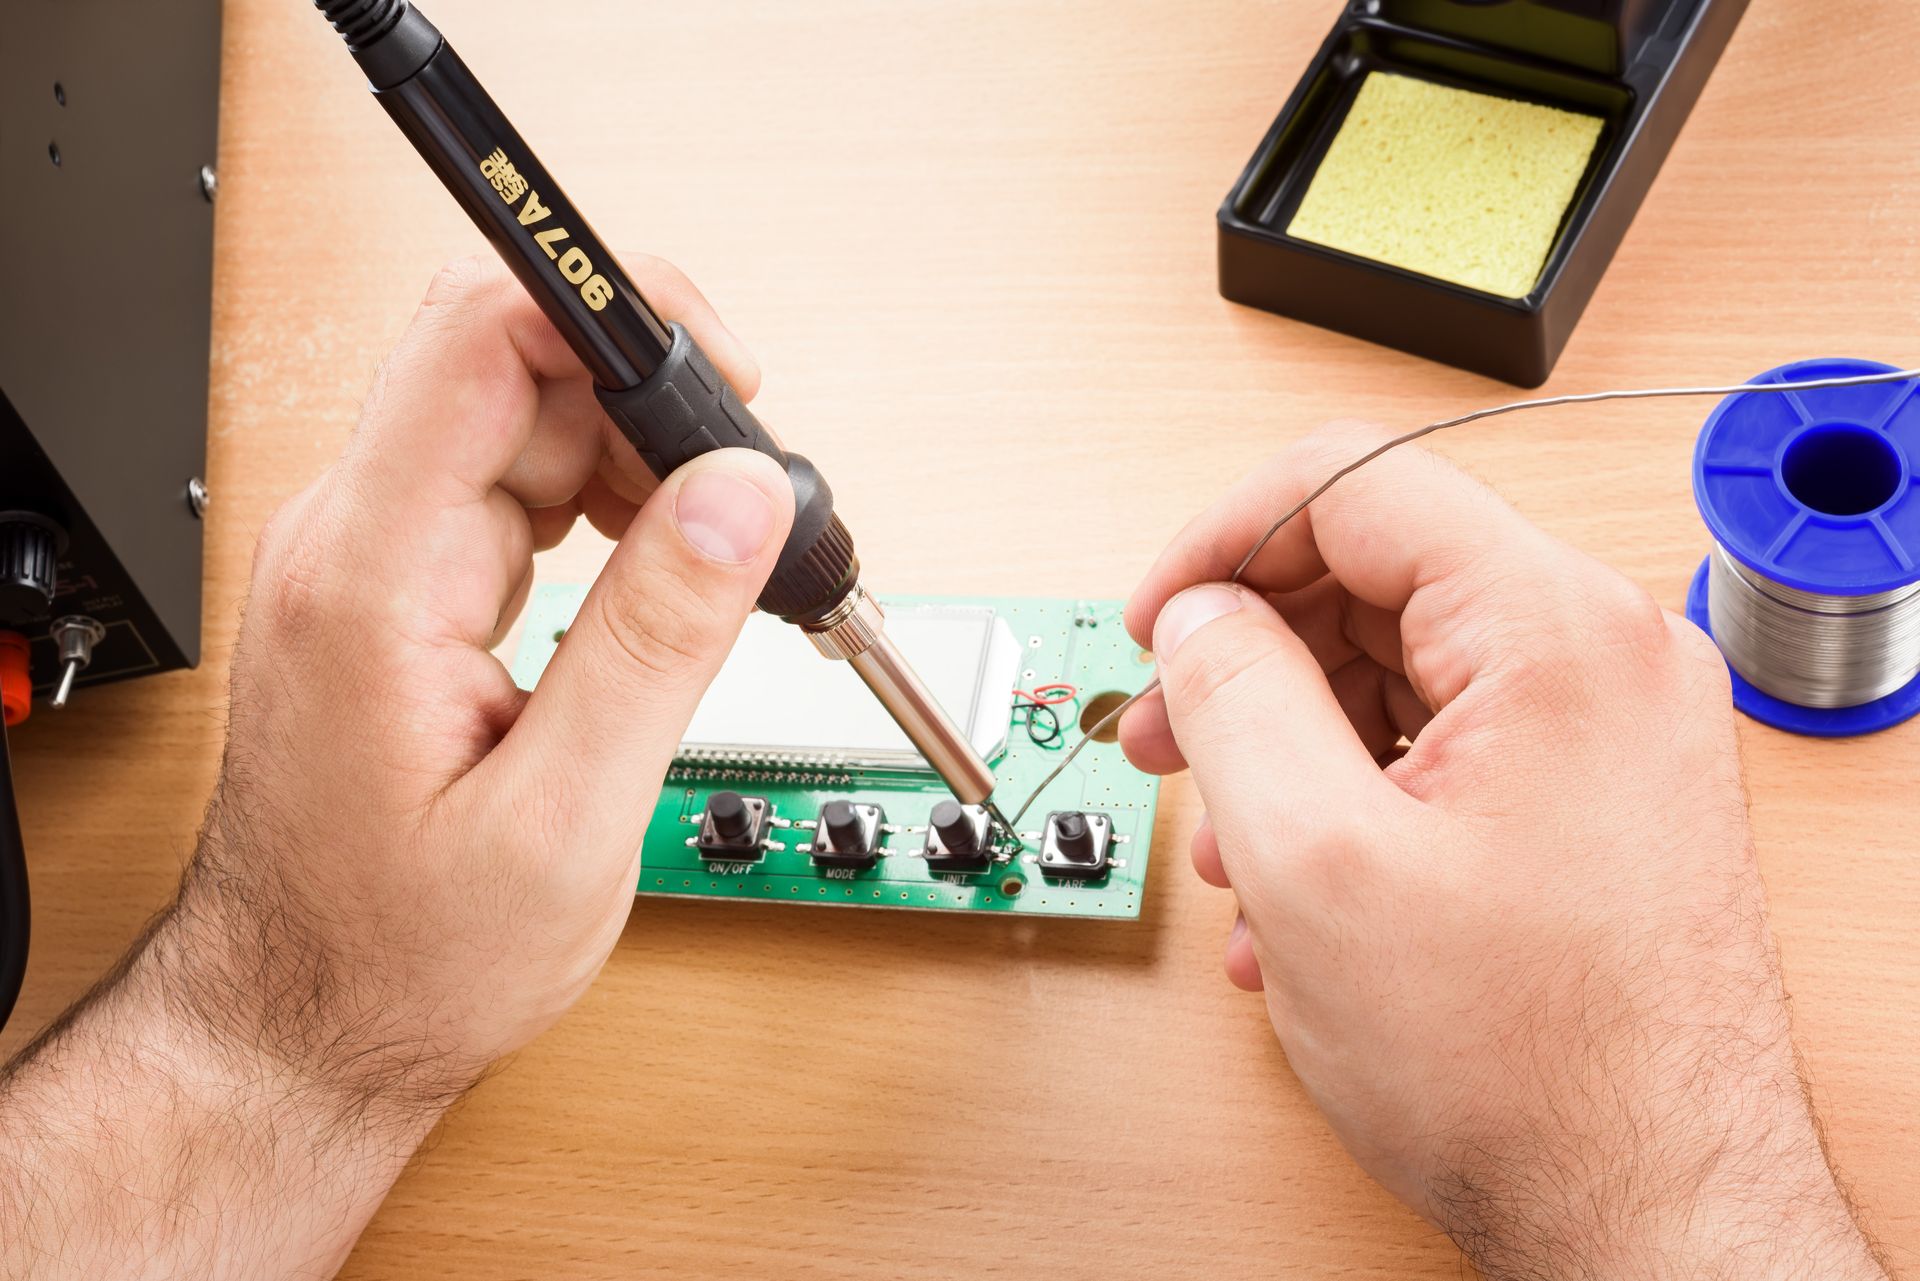
Lutownice to urządzenia, które pozwalają spajać elementy tą techniką. Choć różnią się konstrukcyjnie, to wszystkie posiadają nagrzewający się grot. Oprócz lutownicy musisz użyć spoiwa. Kiedy masz już przygotowane obie te rzeczy, możesz przystąpić do dzieła!
Zatem jak lutować? Przede wszystkim precyzyjnie. Najpierw przyłóż rozgrzany grot do lutowanego elementu. Nigdy do spoiwa! Spowoduje to osadzanie cyny na grocie. Odczekaj chwilę, aż powierzchnie obu łączonych metali się rozgrzeją. Trwa to kilka sekund. Następnie przytrzymaj grot w miejscu spoiny. Przyłóż tam cynę. Wtedy dzięki temperaturze grota i łączonych przedmiotów spoiwo roztopi się, czyli zmieni stan skupienia. I spoina gotowa!
Temperatura lutowania
Kilkakrotnie już wspominaliśmy o tym, jak ważna jest w lutowaniu temperatura. Ma ona podwójne znaczenie. Dzięki niej lut topi się, a łączone elementy zachowują stan stały. Z tego powodu temperatura lutowania musi być wyższa od temperatury topnienia lutu, ale nie wyższa od temperatury elementów.
Spoiwo zależnie od swojego składu chemicznego różni się temperaturą topnienia. Chodzi o zawartość ołowiu. Jeśli jest on obecny, to temperatura topnienia takiego lutu jest niższa (np. 183-190°C). Natomiast jeśli nie, temperatura wynosi np. nieco mniej niż 230°C. Ta różnica ma znaczenie. Użytkownicy bezołowiowych lutów wskazują, że trudniej się roztapiają. Niemniej są bardziej przyjazne zdrowiu i środowisku.
Niezbędne przyrządy
Kiedy wiesz już, jak ogólnie wygląda lutowanie i jak prawidłowo lutować, sprawdź, co musisz mieć w swoim warsztacie. Wiadomo, że centralne miejsce zajmie w nim lutownica, ale dokup także akcesoria lutownicze. W pierwszej kolejności poznasz rodzaje lutownic, a w drugiej pozostały sprzęt.
Co jest potrzebne do lutowania?
Podstawowy sprzęt, jaki masz do wyboru to:
- Lutownica grzałkowa (oporowa) – najpopularniejsza i najtańsza pośród lutownic. Ma osobny zasilacz i wytwarzającą ciepło grzałkę. Ciepło poprzez drut trafia do grotu. Interesujesz się szeroko pojętą elektroniką? Dopiero zastanawiasz się, jak lutować? Ten rodzaj jest doskonały dla Ciebie!
- Lutownica transformatorowa – posiada zintegrowany transformator. Dzięki niemu przez grot lutownicy przepływa prąd o dużym natężeniu, co szybko generuje wysoką temperaturę. Model transformatorowy umożliwia wygodne lutowanie np. przewodów elektrycznych.
- Lutownica gazowa i na baterie – pierwszą zasila zwykle propan-butan, a drugą, jak wskazuje nazwa, baterie. Obie charakteryzują się dużą mobilnością. Można ich używać praktycznie wszędzie, nawet w miejscach bez dostępu do sieci elektrycznej. Nie zapewniają jednak wysokiej mocy.
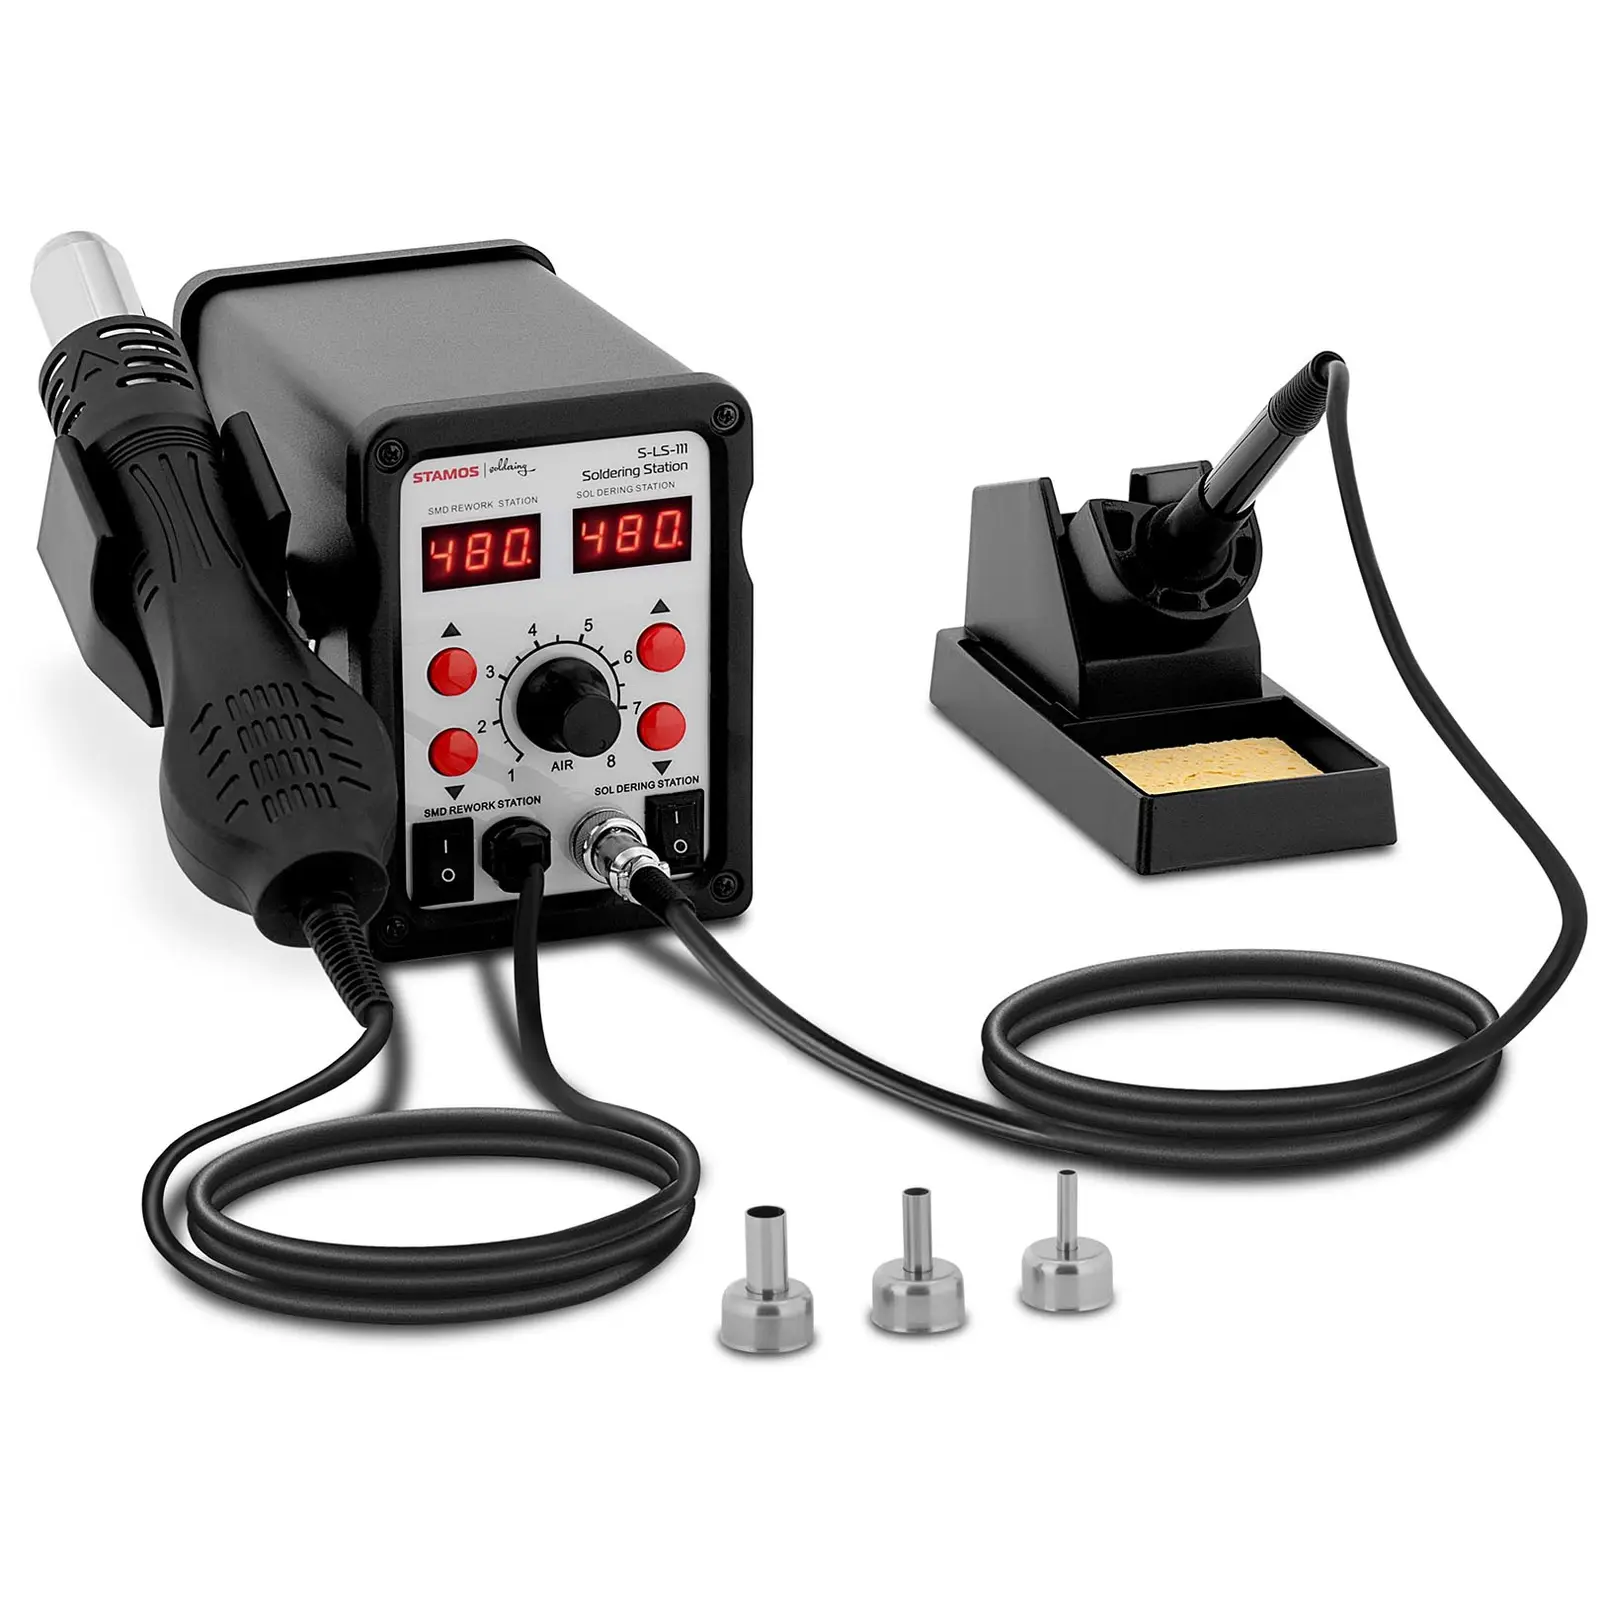
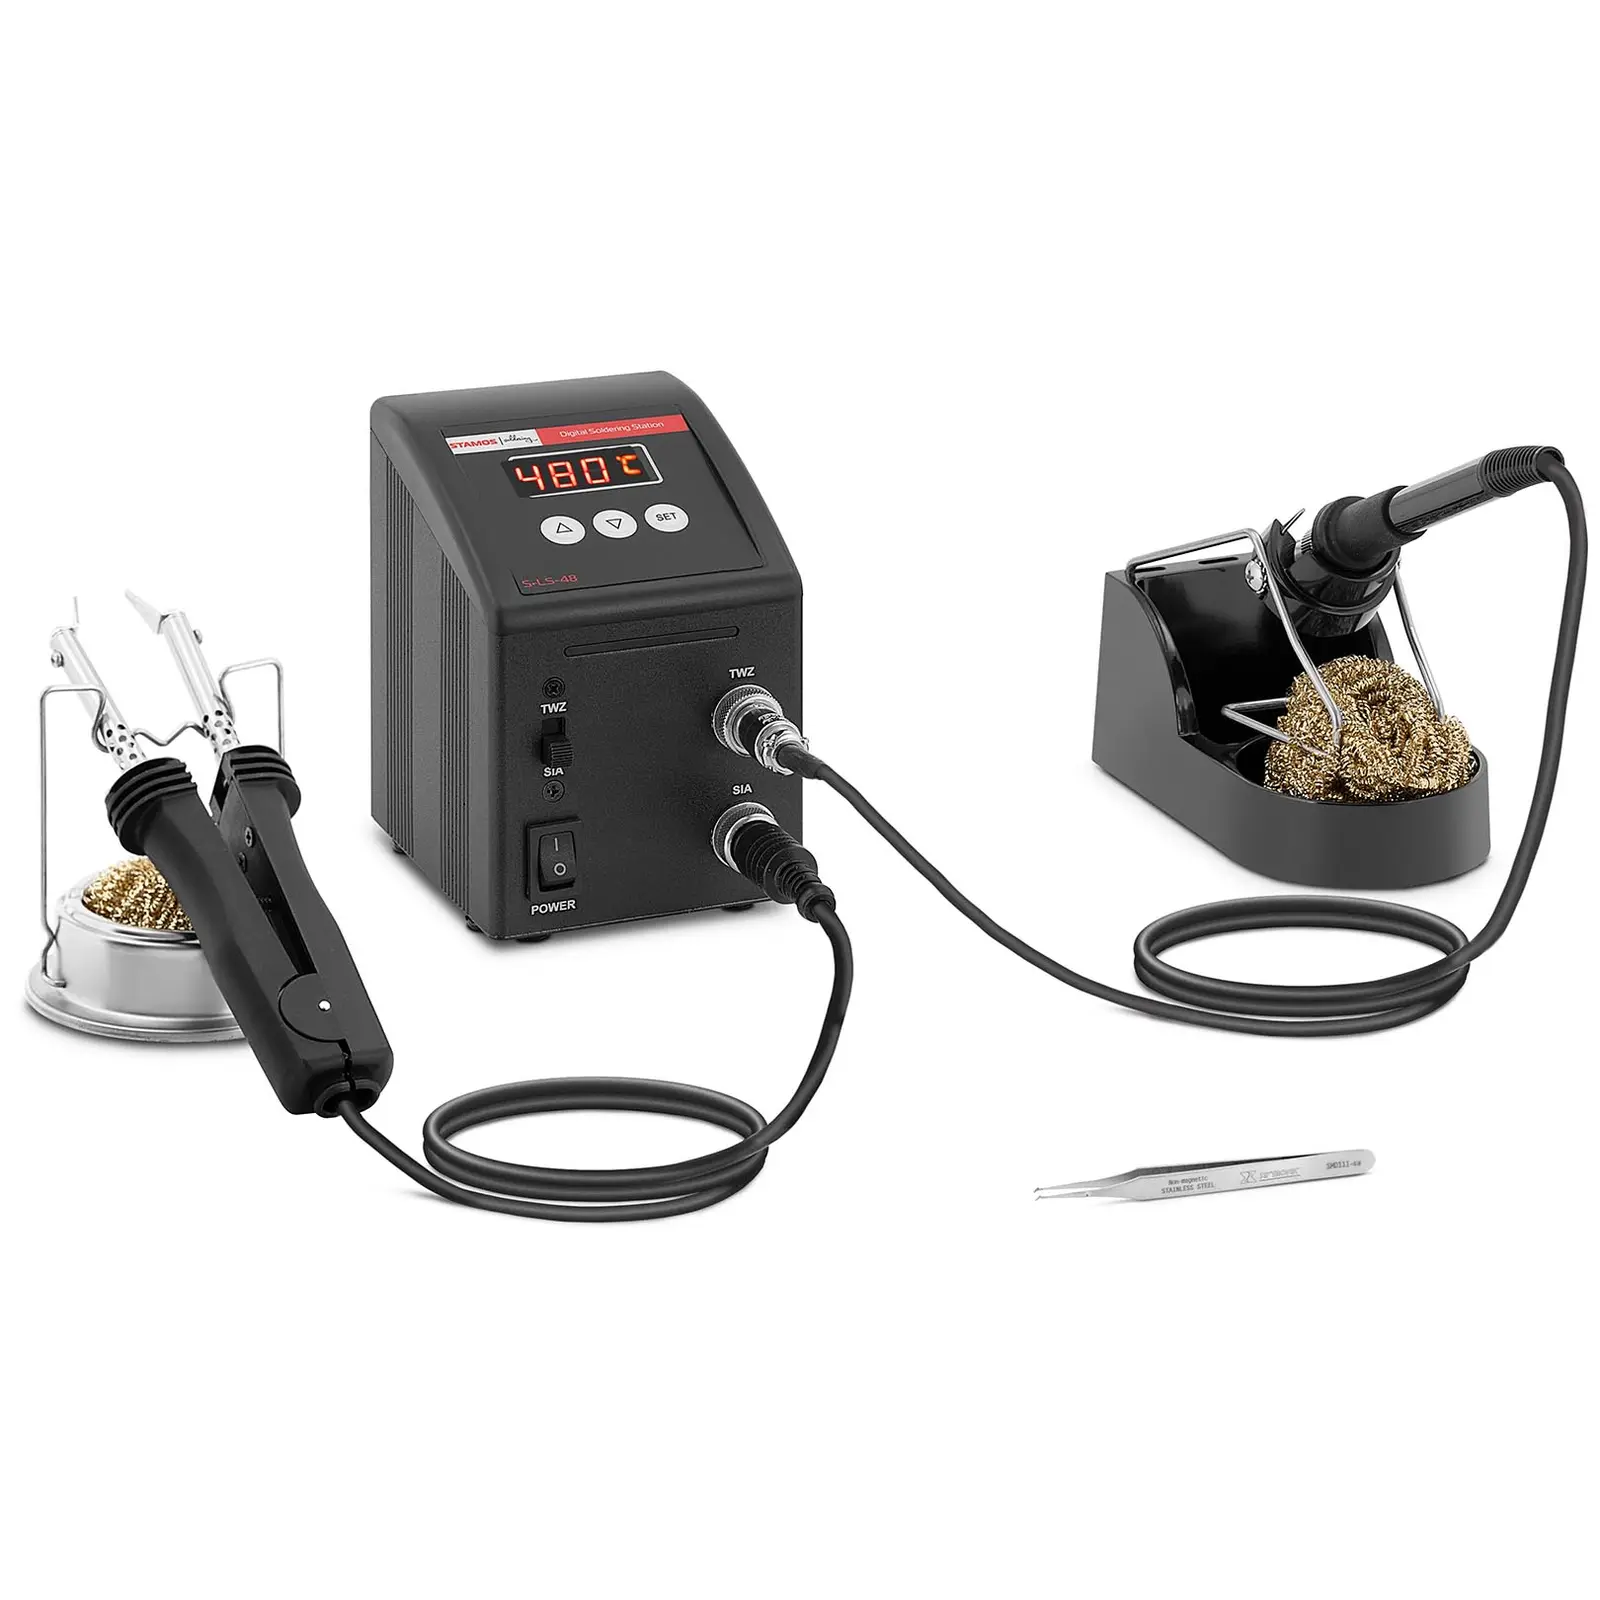
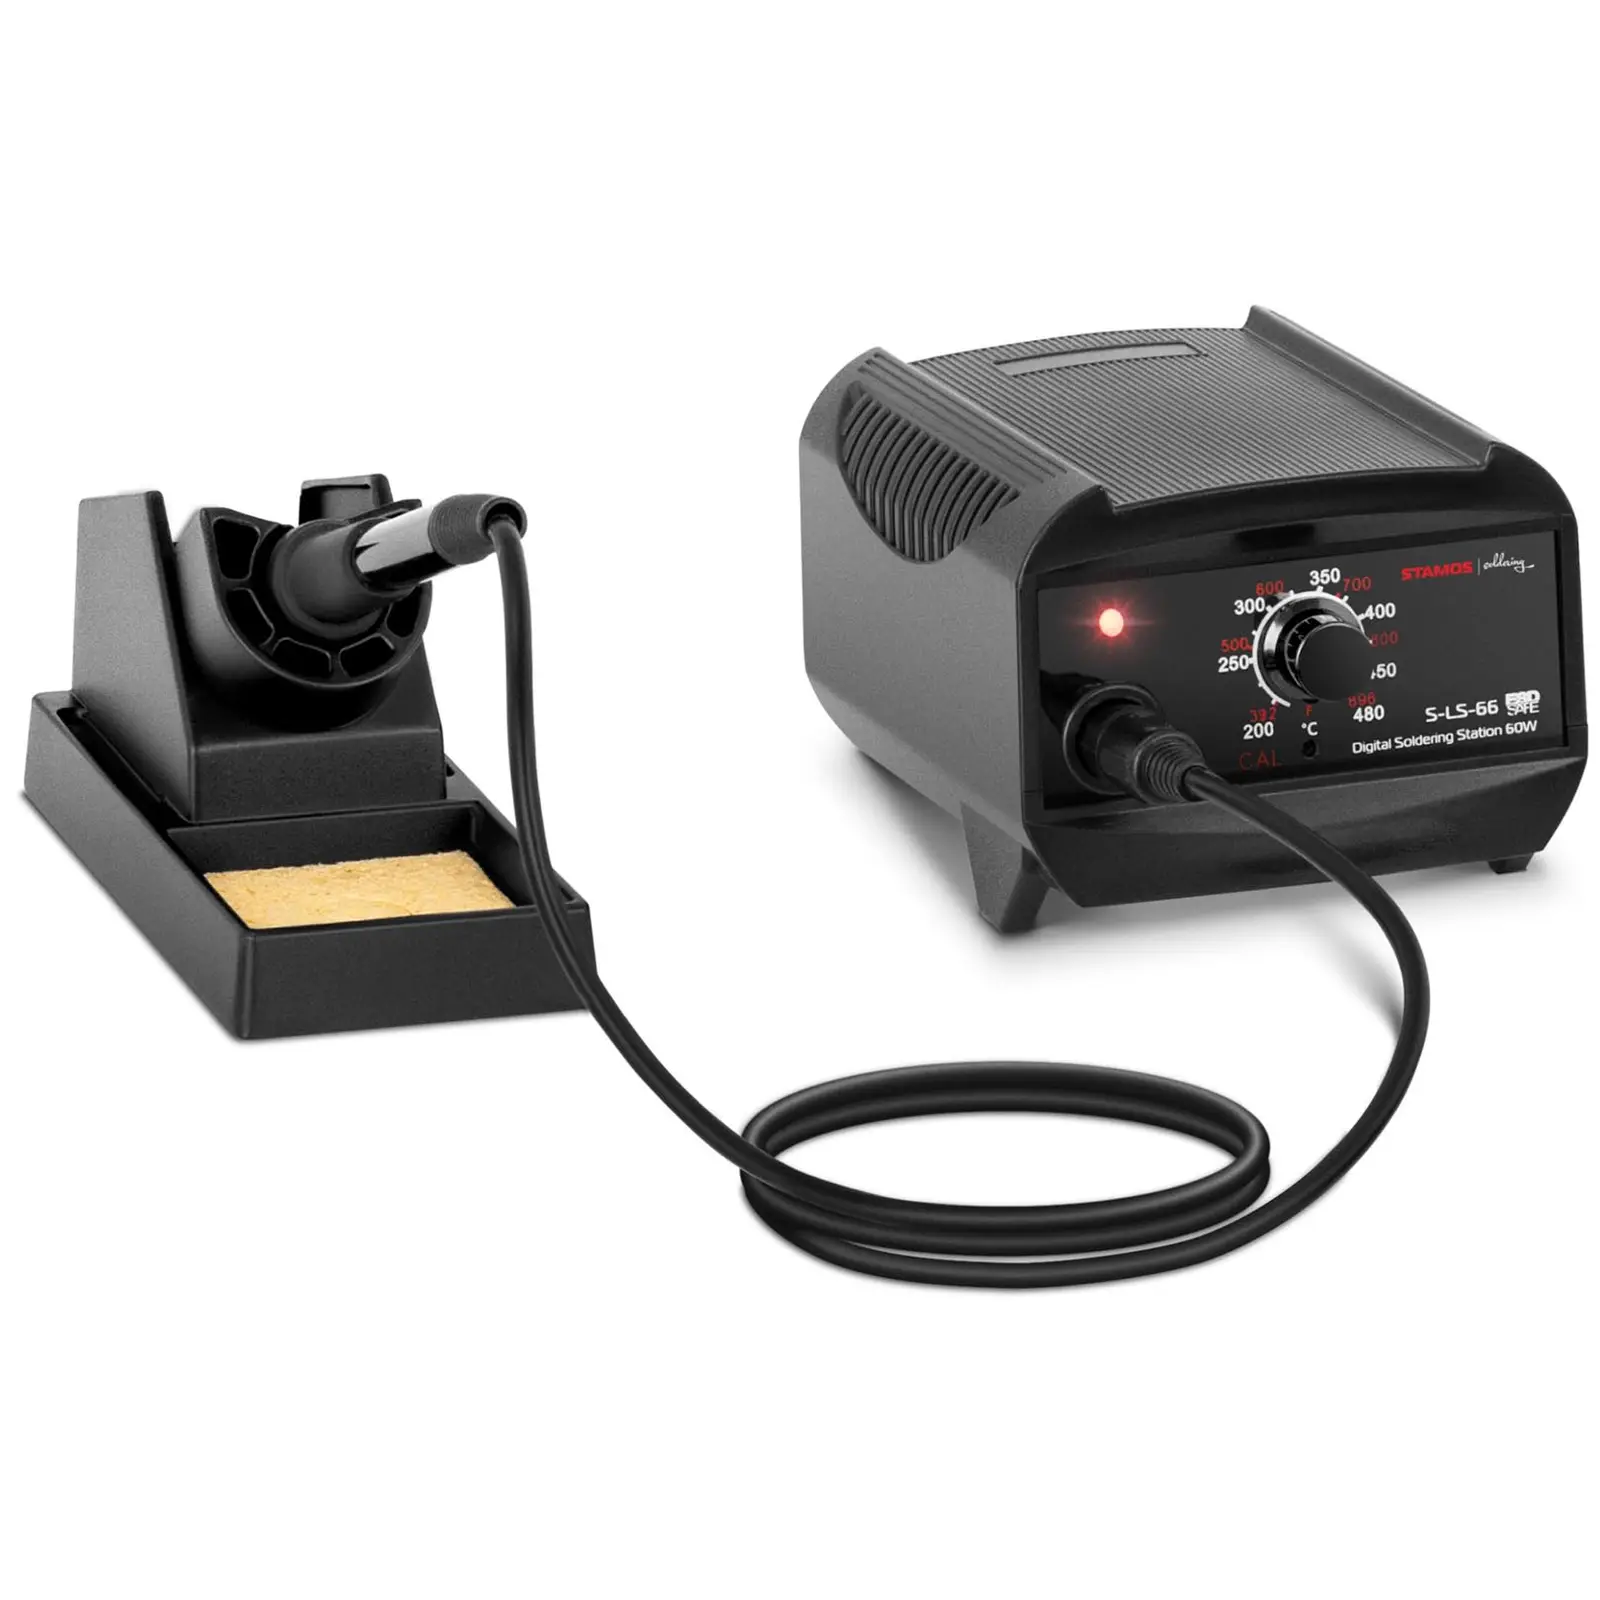
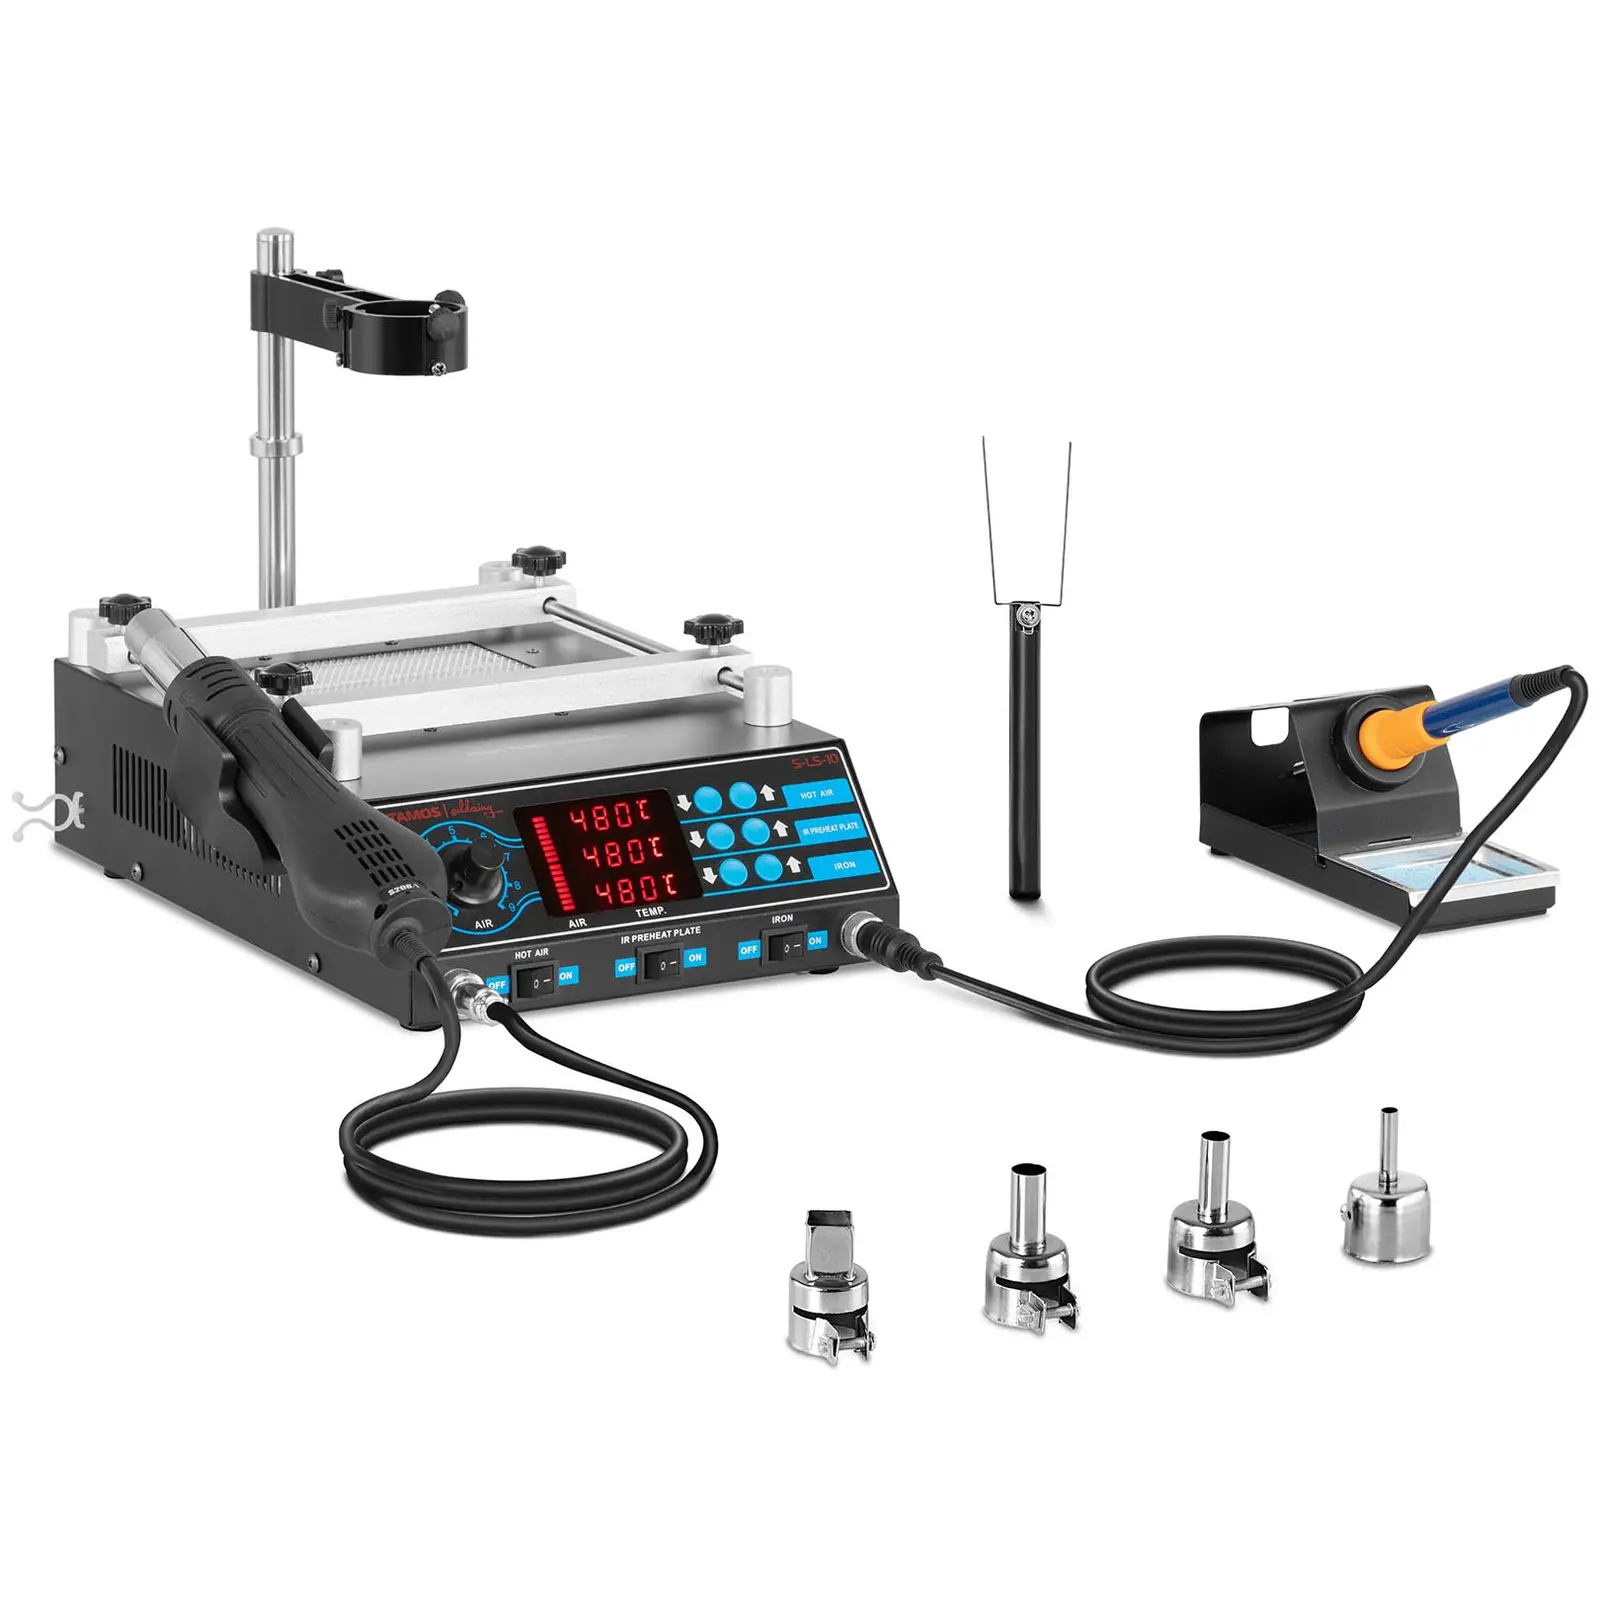
- Stacje lutownicze – składają się z kolby do lutowania oraz panelu sterowniczego. Z tego względu stanowią najbardziej zaawansowany sprzęt do lutowania. Gwarantują precyzyjną regulację temperatury i mocy, dlatego dokładnie dopasujesz je do swoich potrzeb. Czasem są doposażone np. w odsysacz oparów lub lampę z lupą.
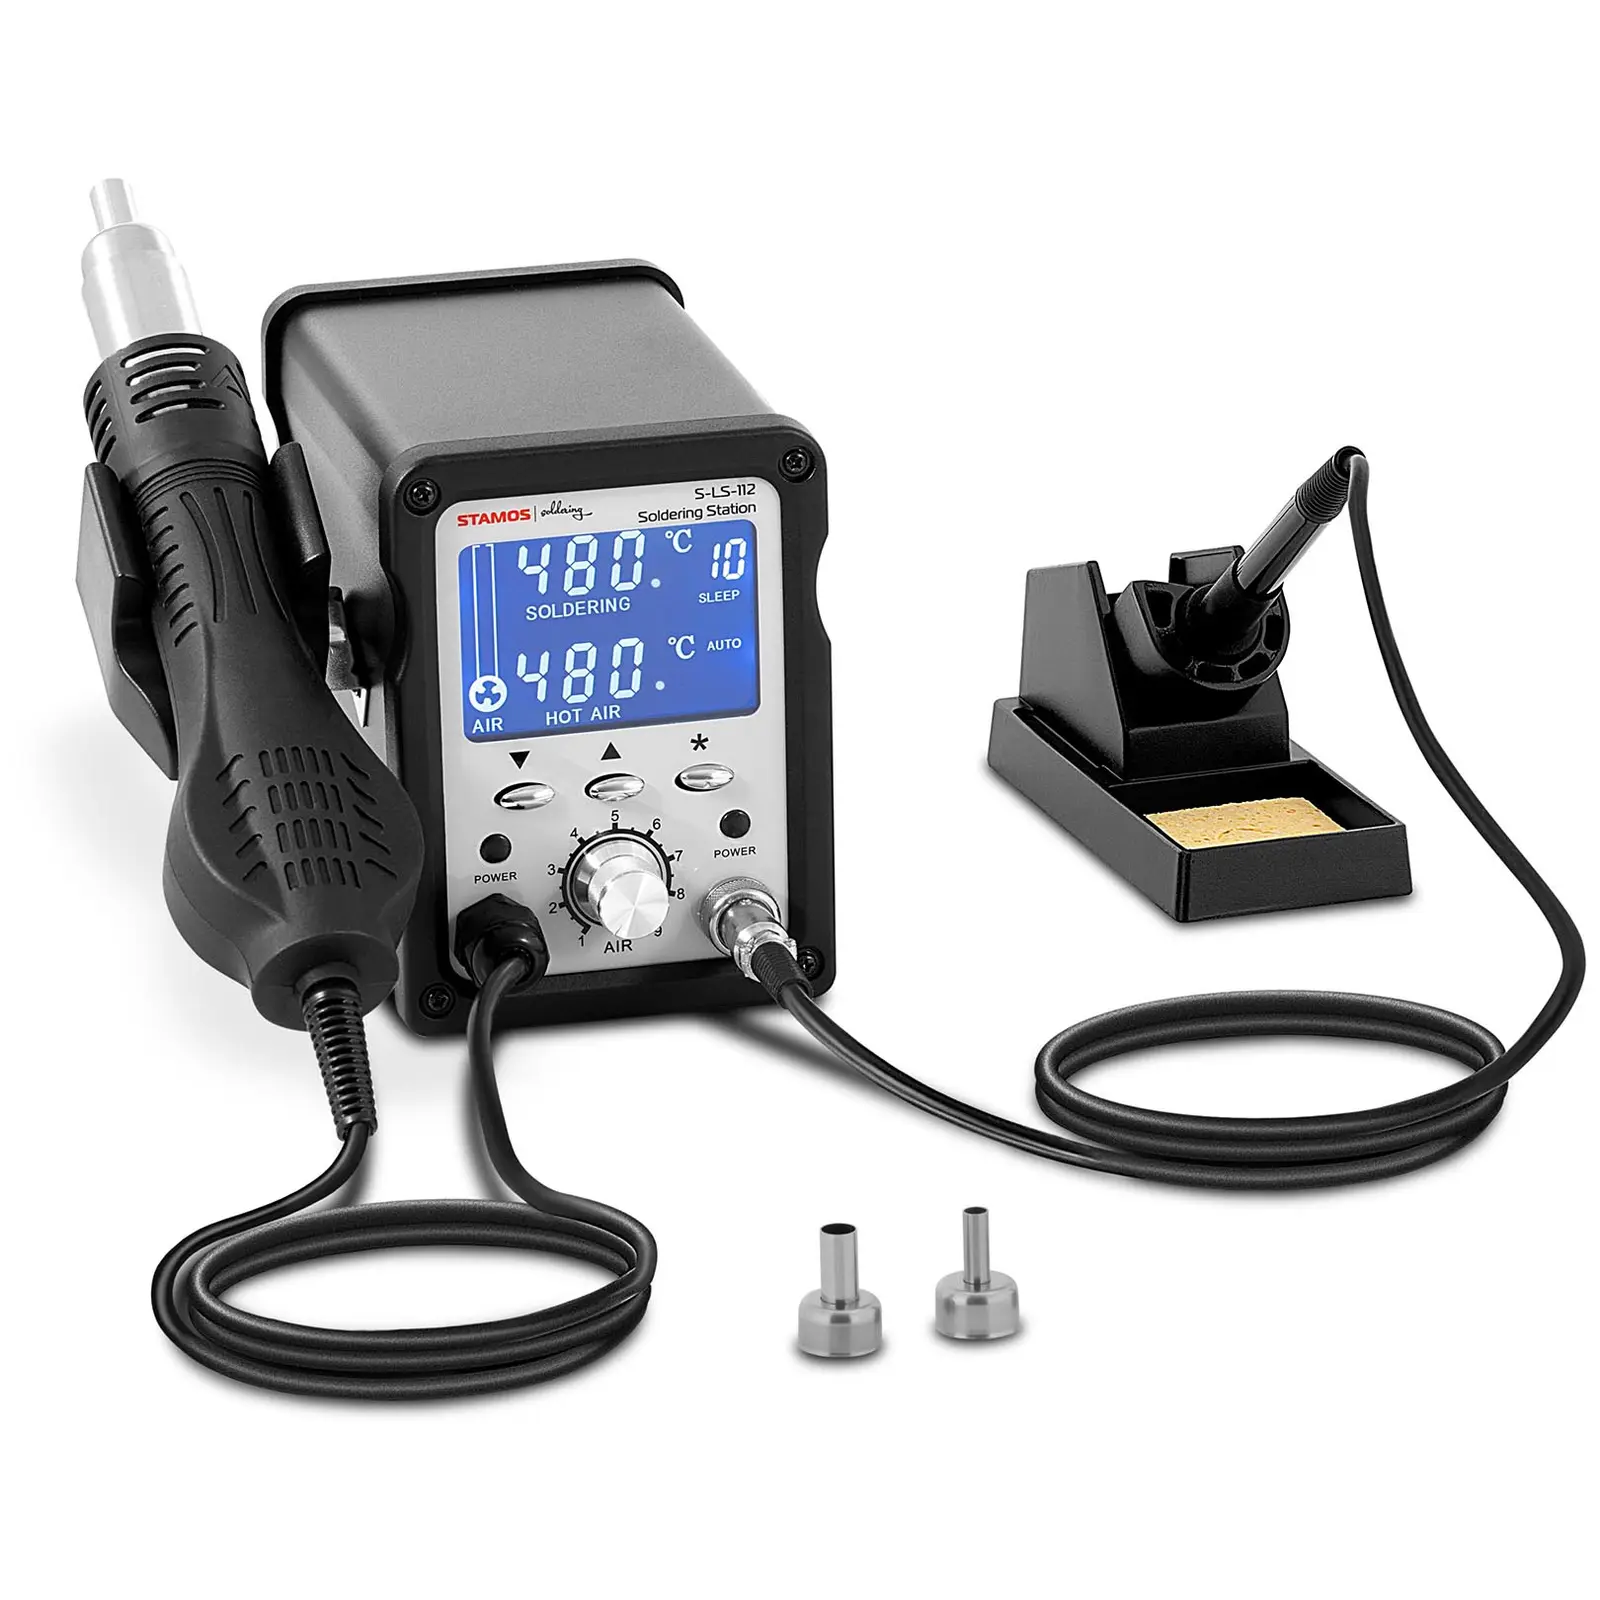
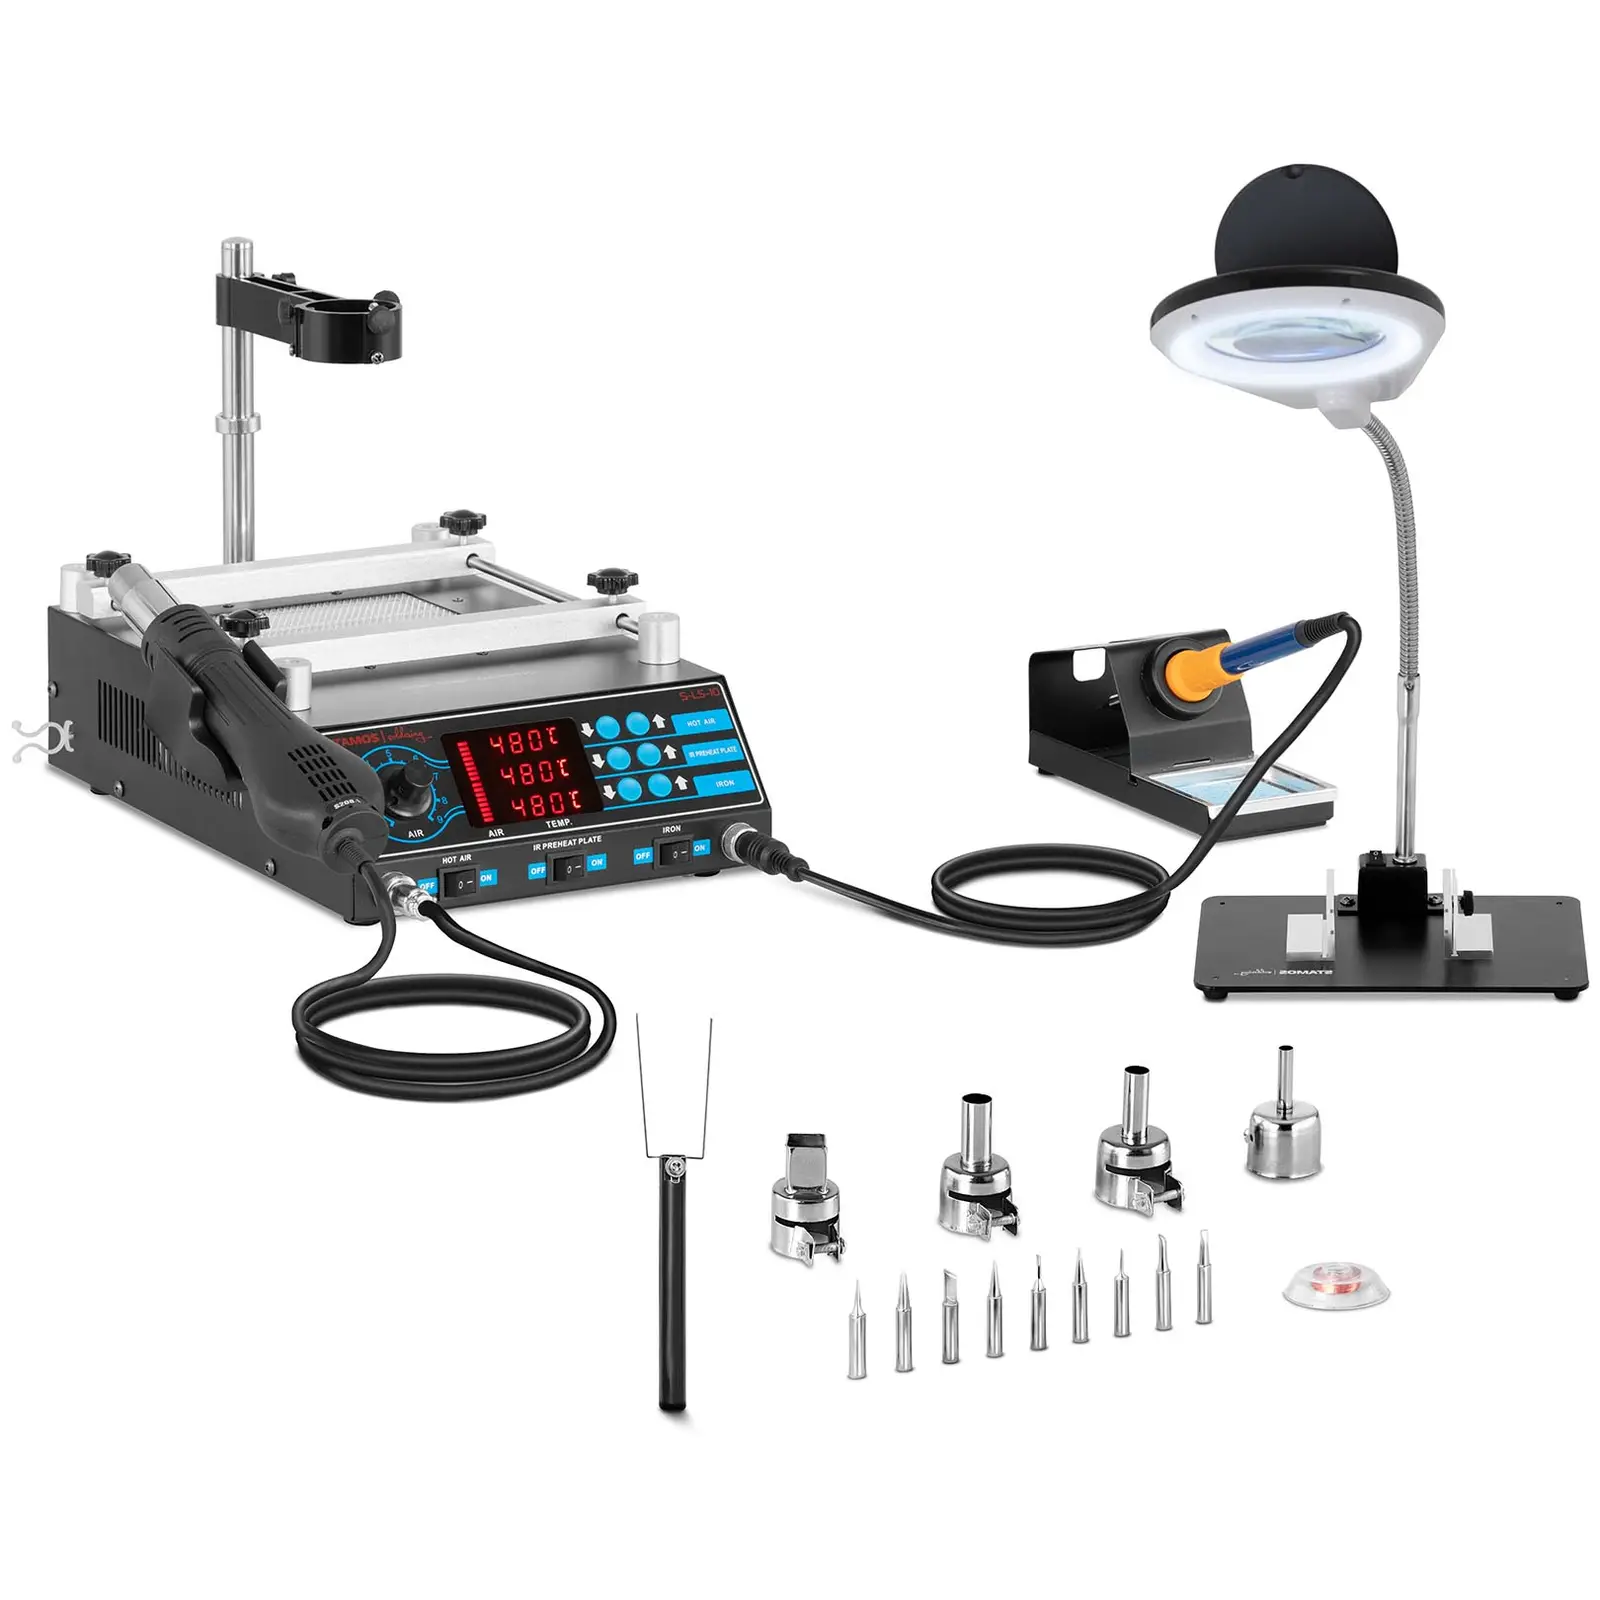
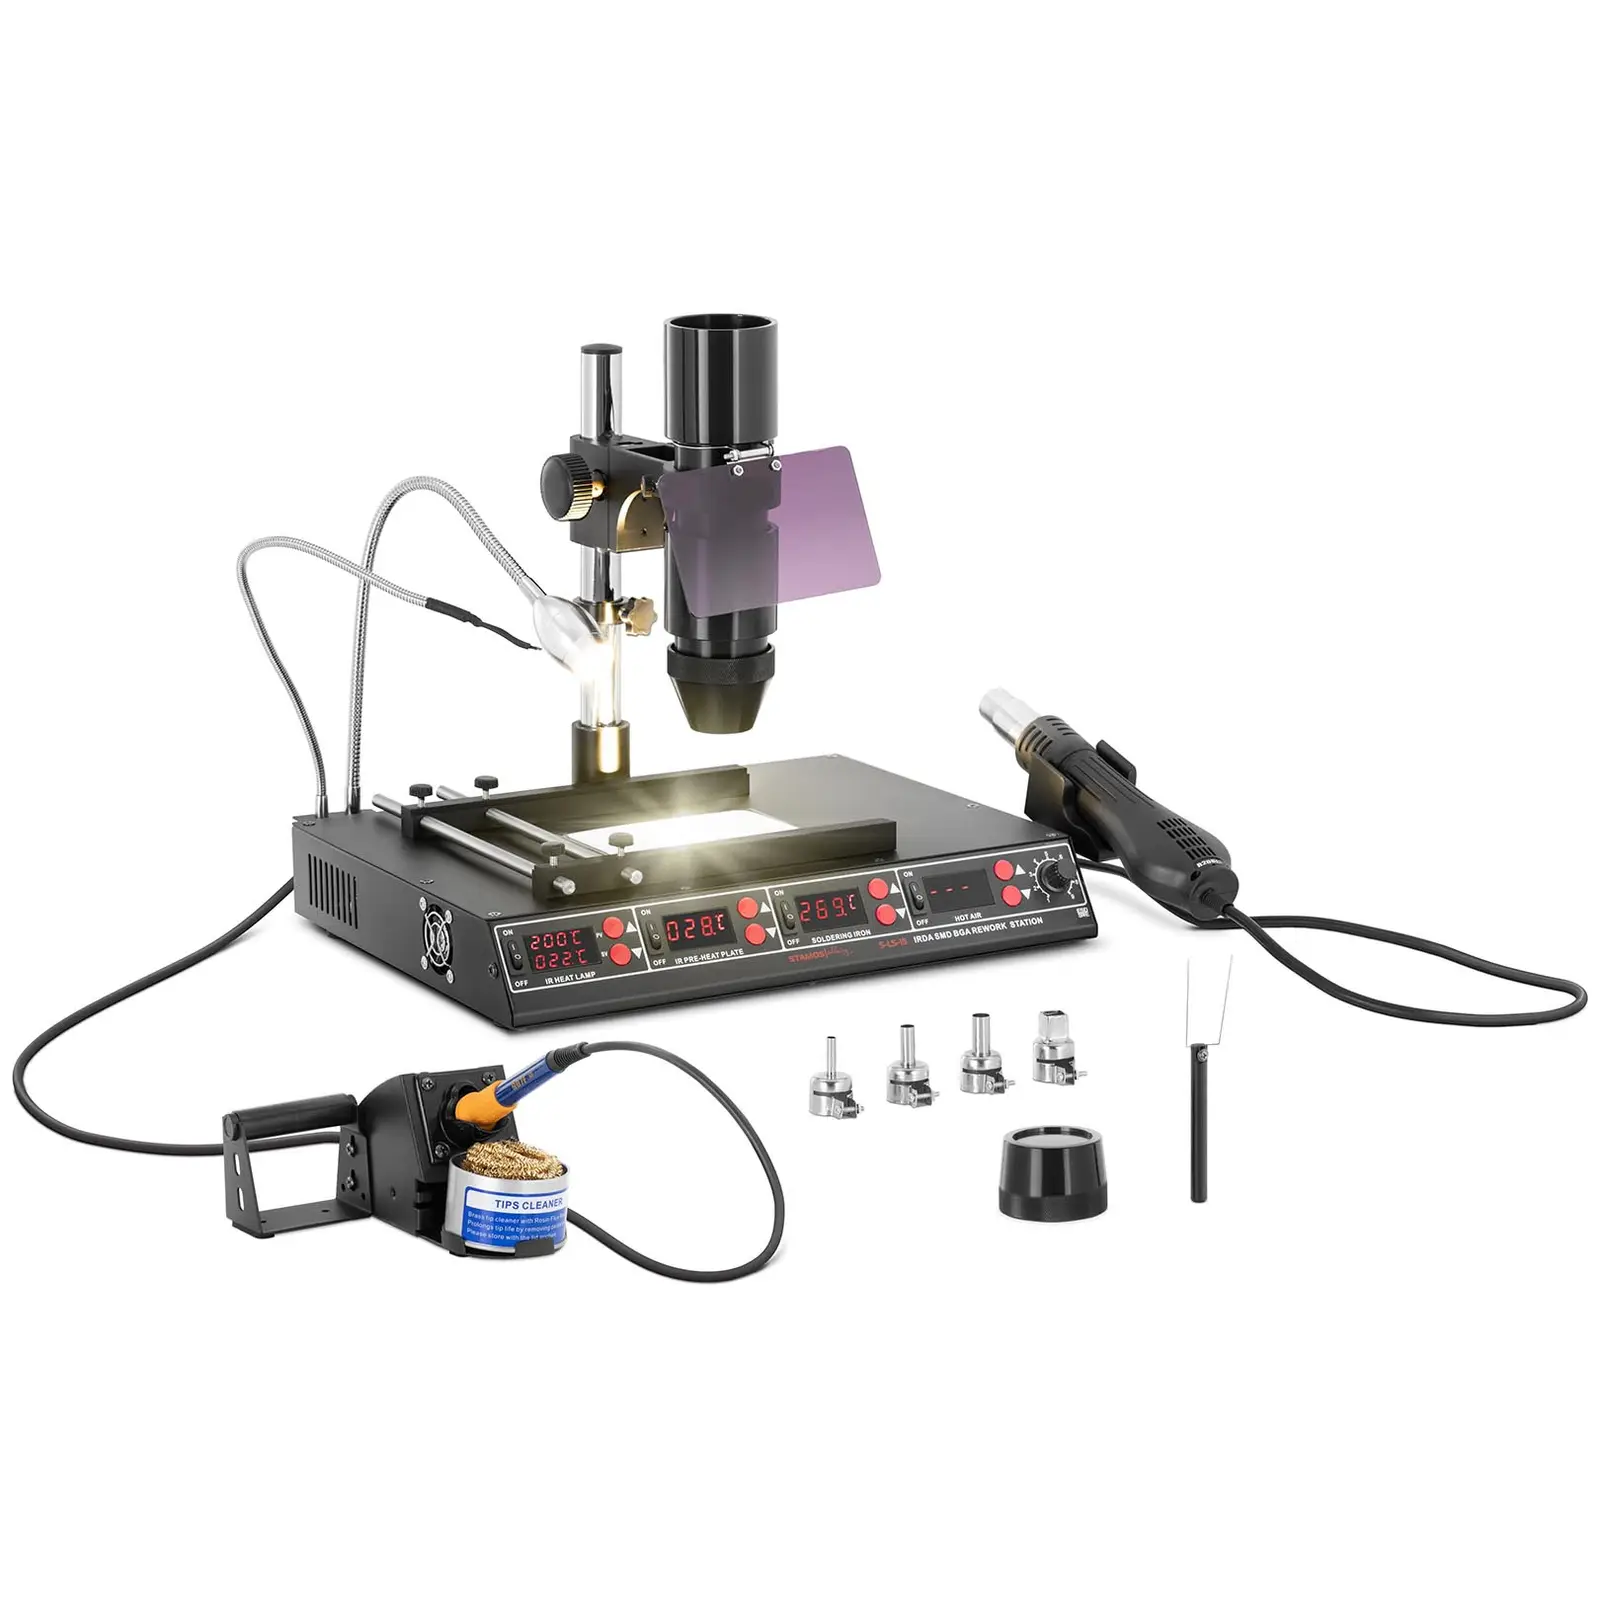
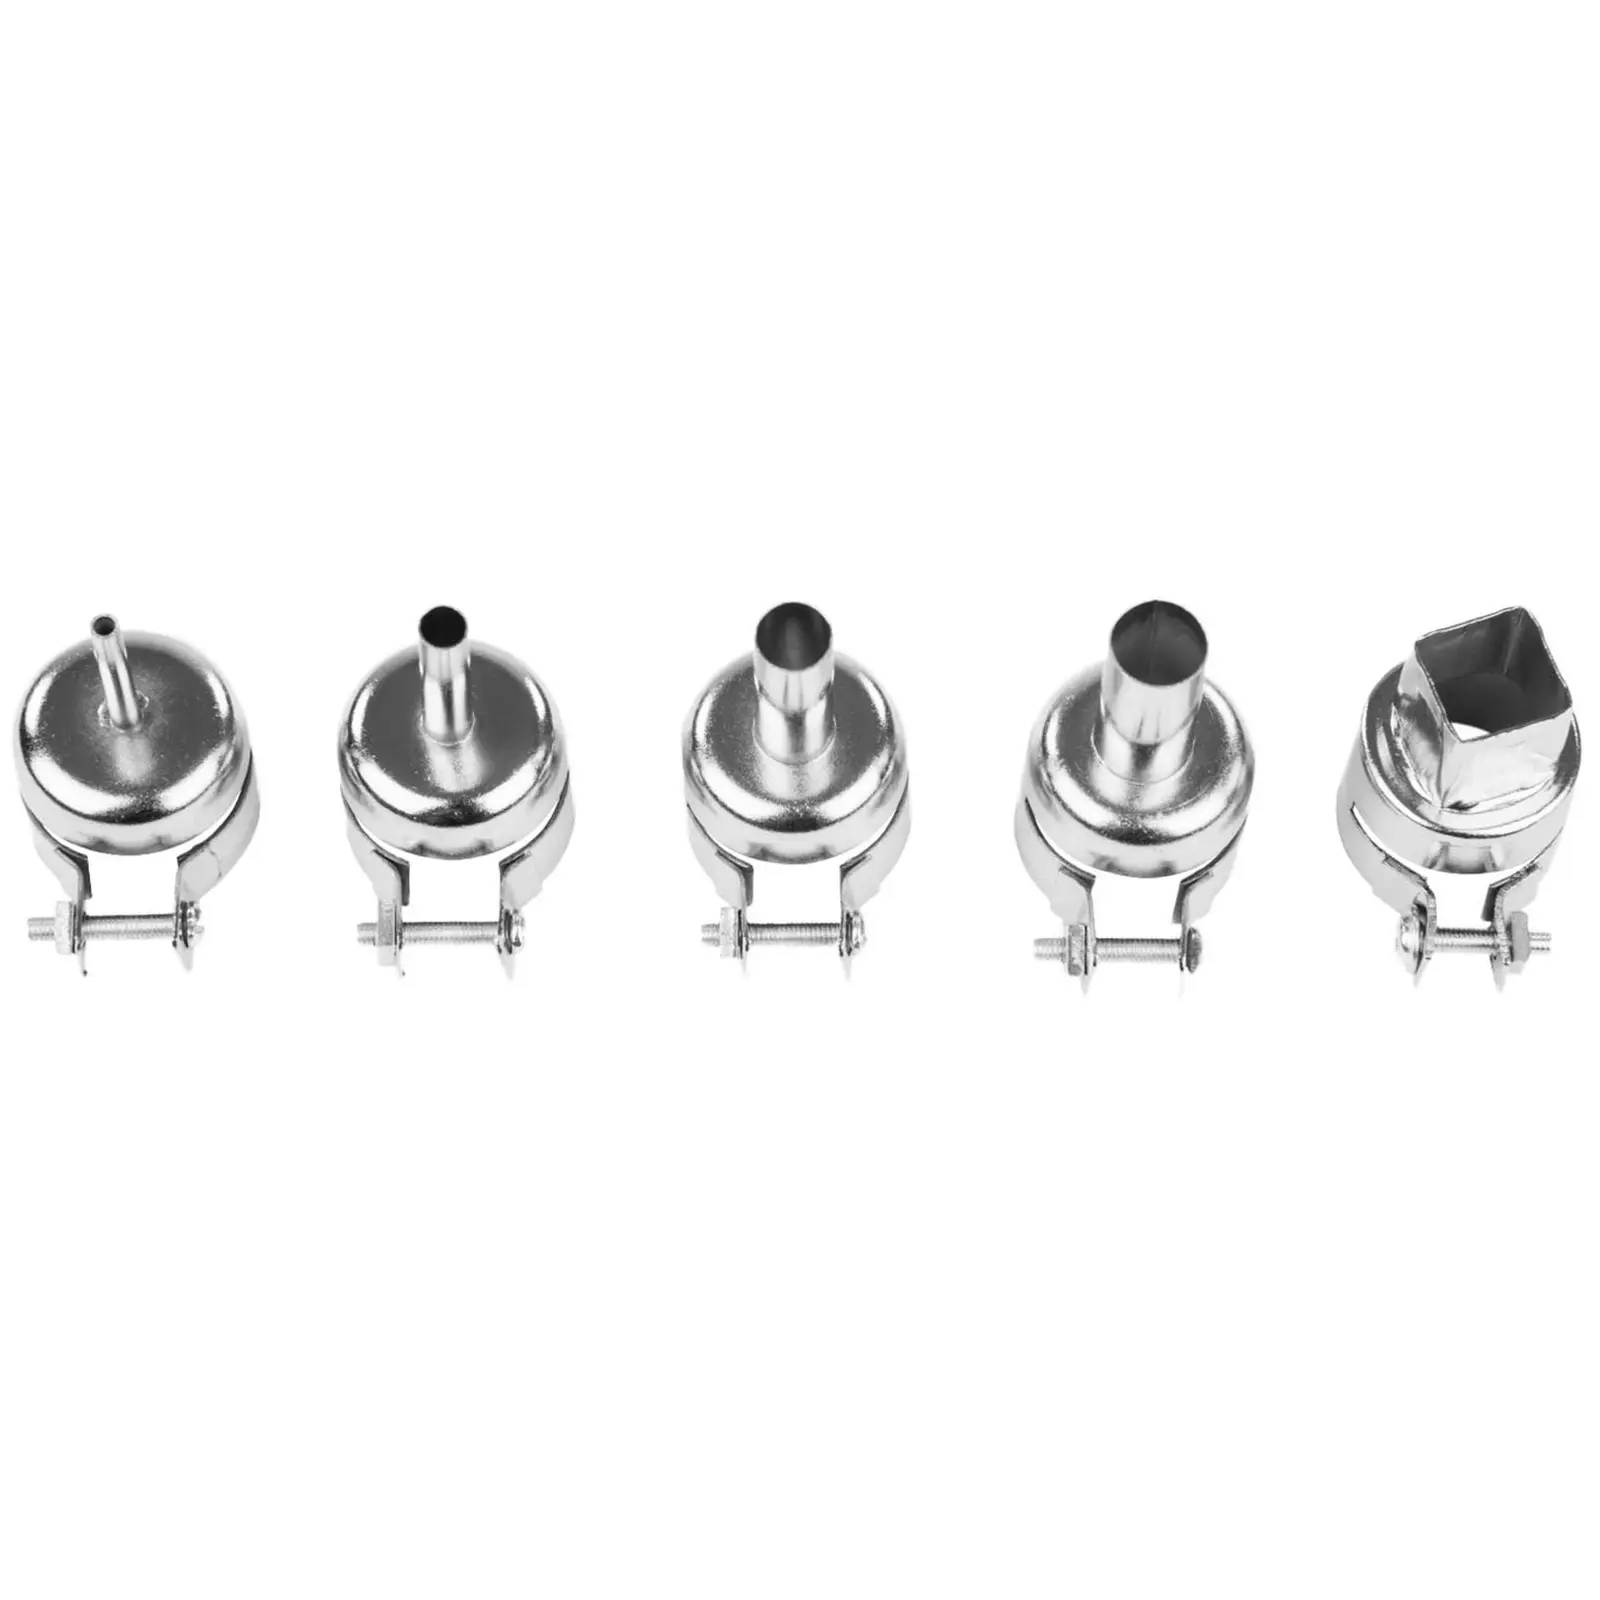
- Stacje lutownicze z kolbą gorącego powietrza – to jeszcze bogatsze wersje poprzednich. Wyjątkowo dobrze nadają się do lutowania i rozlutowywania komponentów SMD, czyli montowanych powierzchniowo. To jednak nie wszystko, co potrafią! Z powodzeniem suszą farby, usuwają kleje, obkurczają folię termozgrzewalną itp. Zastanawiasz się, jak lutować i jednocześnie mieć pod ręką wszechstronne narzędzie? Wybierz stację zawierającą obie kolby lutownicze – tradycyjną i na gorące powietrze.

Kiedy masz już absolutnie niezbędny sprzęt, przyszedł czas na wybór przydatnych akcesoriów. Warto je mieć, ponieważ sprawiają, że praca jest łatwiejsza, bardziej precyzyjna i bezpieczna. Proponujemy taki sprzęt jak:
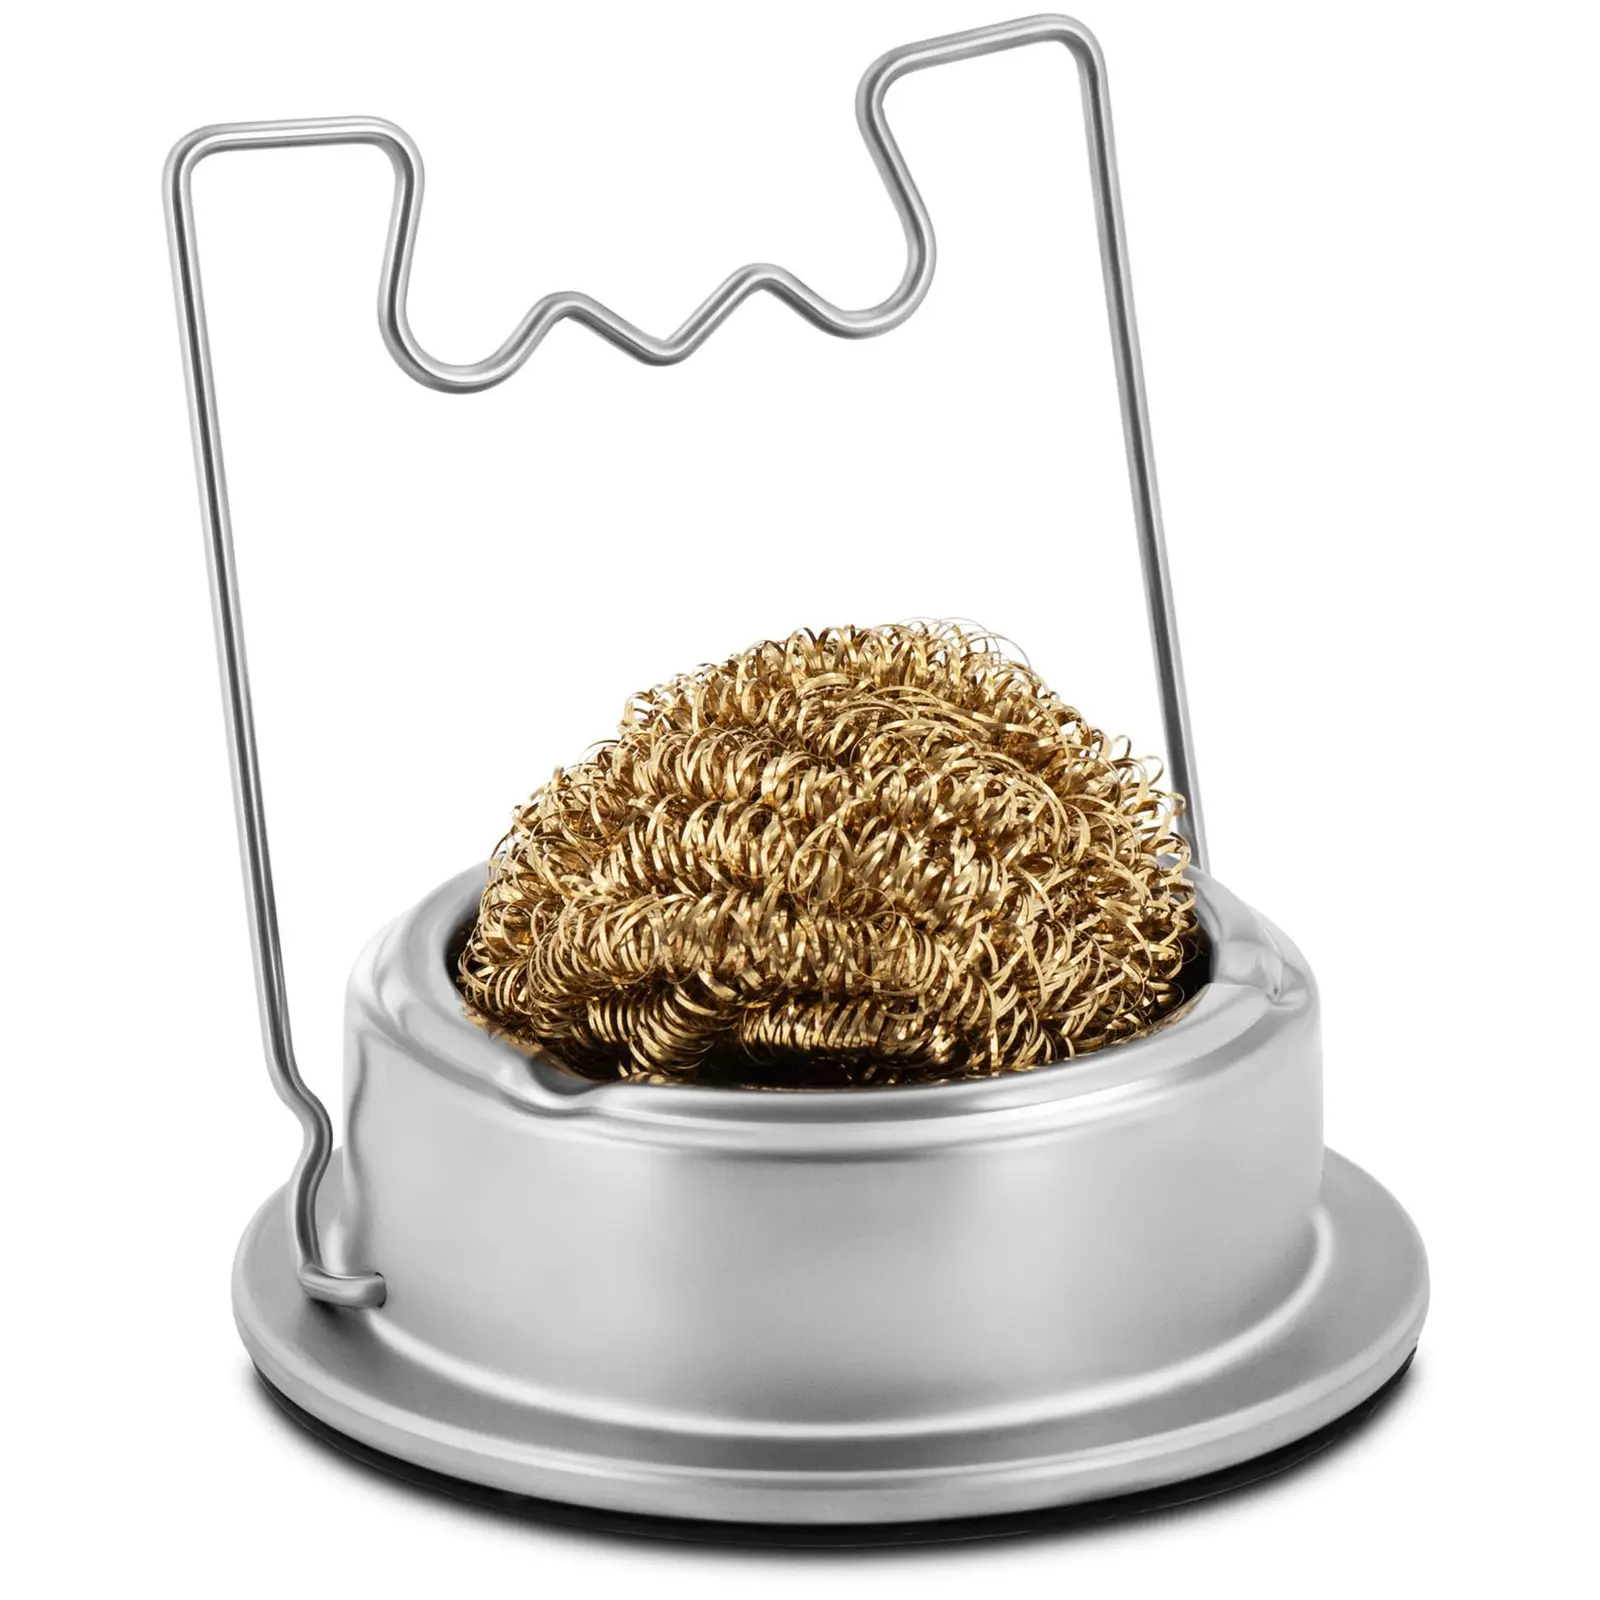
- Czyścik do grotów – zapewniający oczyszczenie grota z cyny i innych substancji. Zwykle wykonany jest z metalowych wiórków.
- Gąbka do grotów – to tańsza alternatywa dla czyścika. Charakteryzuje się krótszą wytrzymałością. Wymaga zwilżania przed użyciem.
- Podnośnik (chwytak) IC-popper – służy do łatwiejszego podnoszenia rozgrzanych komponentów. Składa się z długiej rączki i widełek.
- Pochłaniacz oparów lutowniczych – jest niezbędny w profesjonalnej działalności. Wchłania opary lutownicze (mogące zawierać np. szkodliwy ołów), na które narażony jest pracownik często przez wiele godzin. Pochłaniacze mogą posiadać dwa ramiona z dyszami przystosowane do jednoczesnej ochrony dwóch stanowisk. Wersje mniejsze wygodnie ustawisz na biurku.
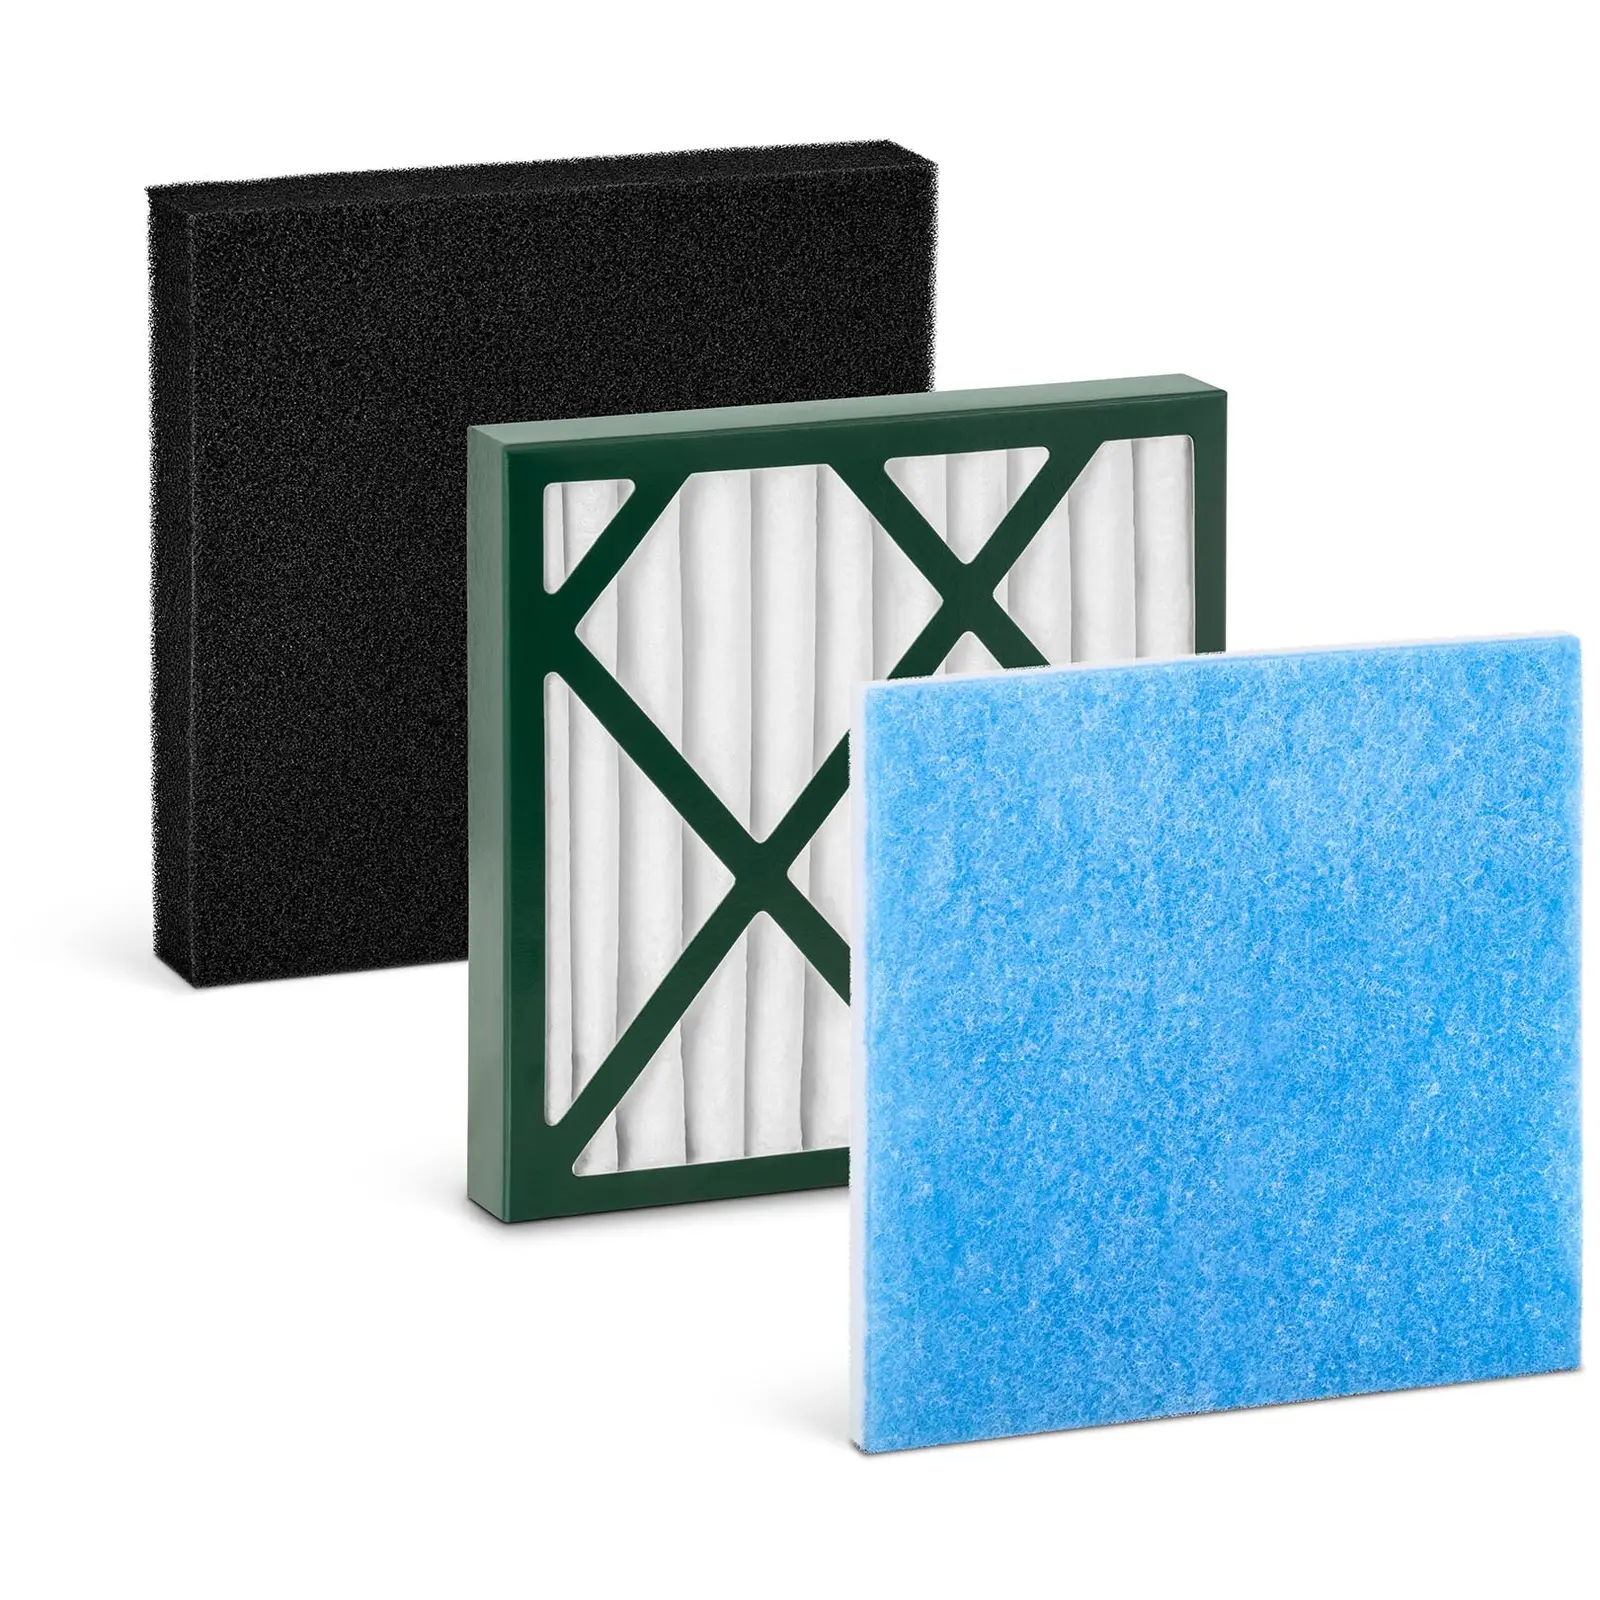
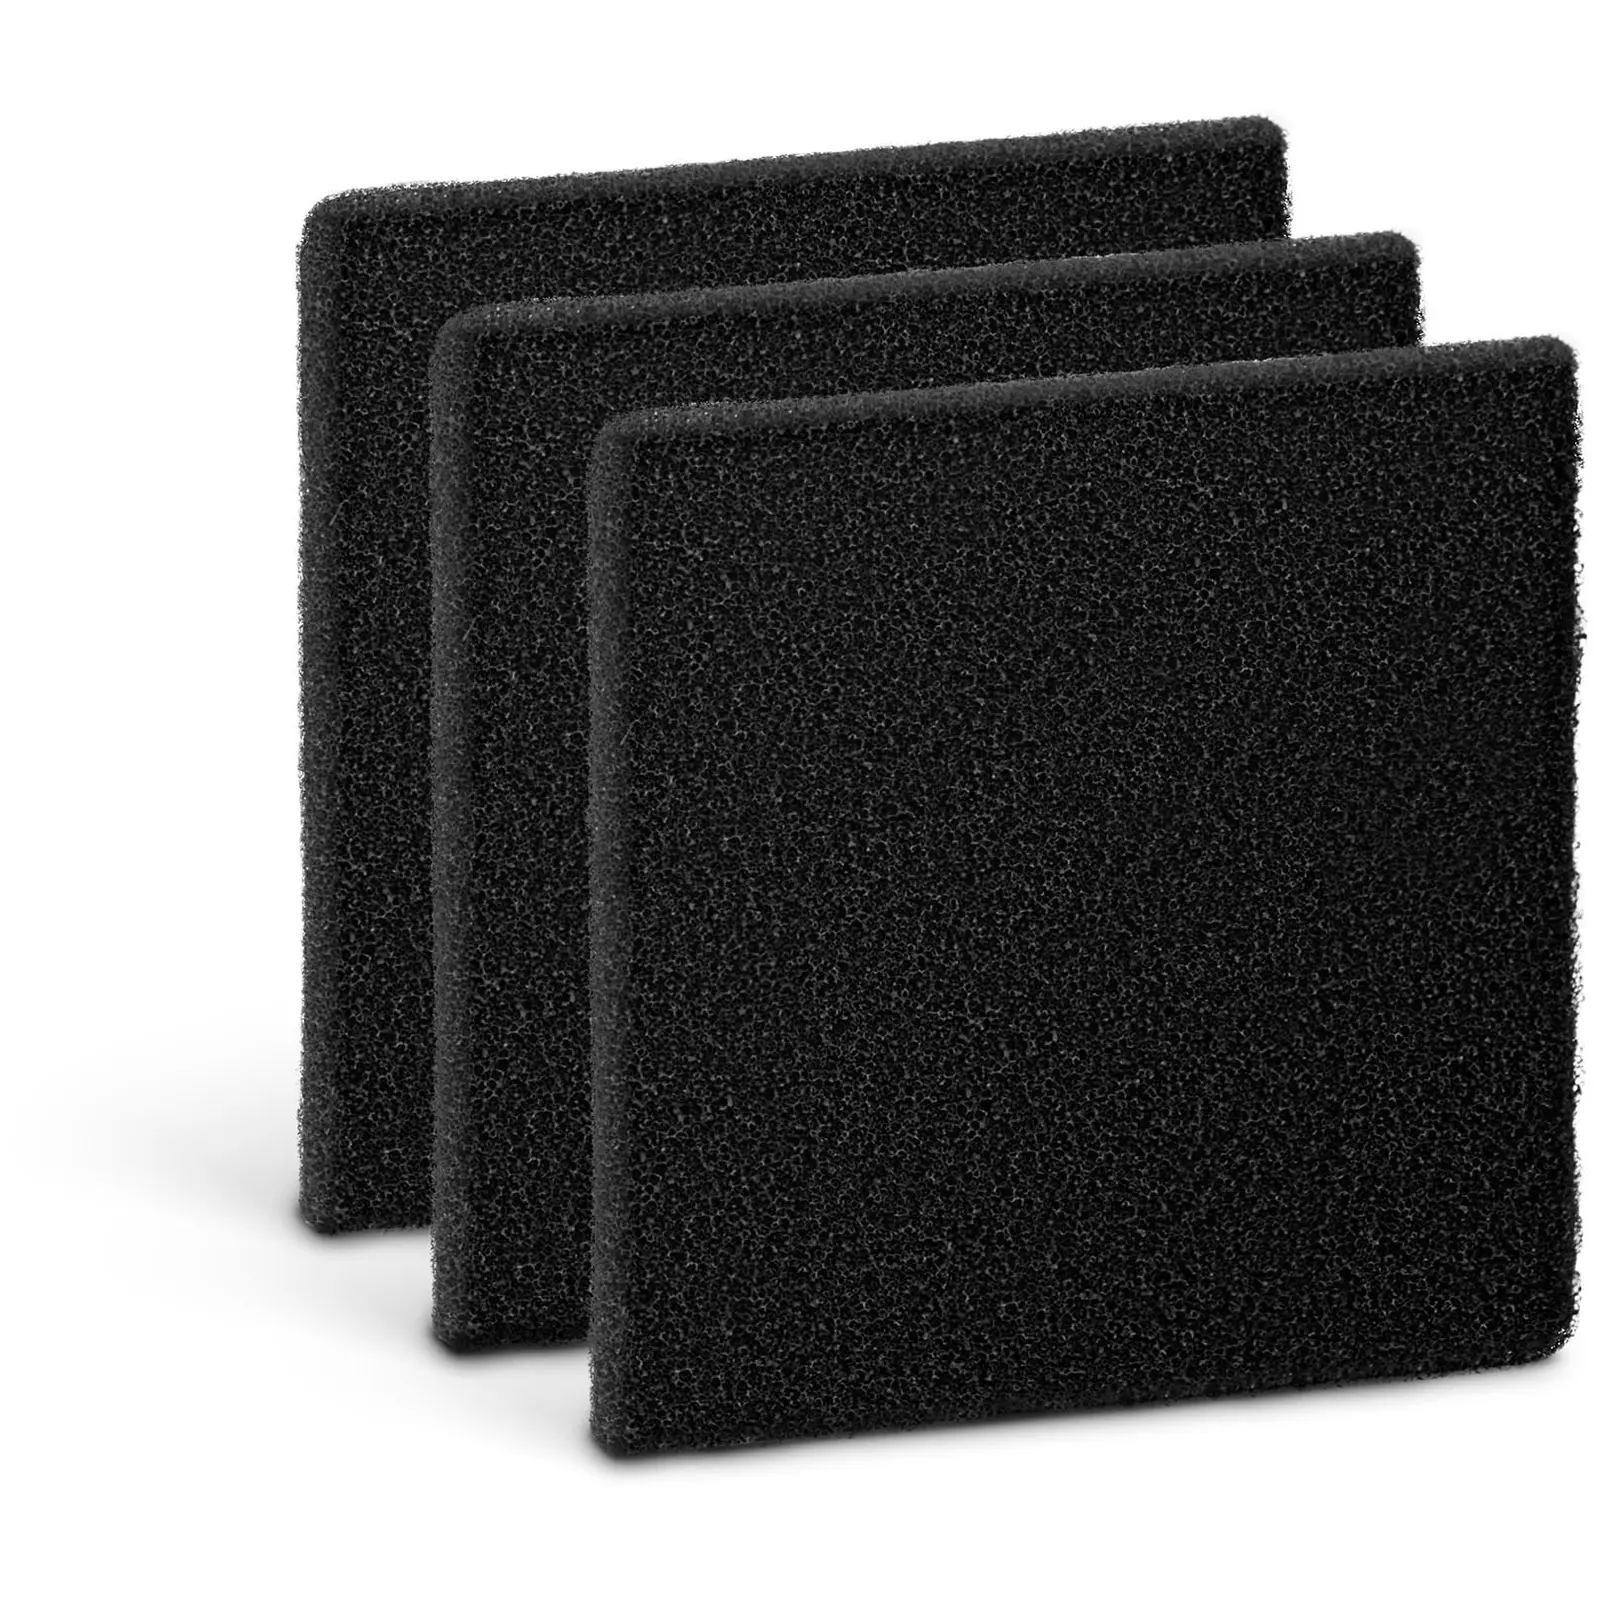
- Filtry do pochłaniacza – niezależnie od tego, jaki model pochłaniacza wybierzesz, z czasem staniesz przed koniecznością wymiany filtra. Najskuteczniejszą filtrację (trzystopniową) zapewniają trzyczęściowe zestawy złożone z filtra wstępnego, węglowego i HEPA.
- Lampa ze szkłem powiększającym – pozwala zwiększyć precyzję pracy i komfort wzroku. Kilkukrotne powiększenie (5- lub 10-krotne) nieraz jest niezbędne, aby dostrzec wszystkie detale. Dlatego połączenie równomiernego oświetlenia, braku padającego cienia i znacznego powiększenia to często konieczne rozwiązanie podczas lutowania.
- Uchwyty montażowe tzw. trzecia ręka – są niezbędne, kiedy zastanawiasz się, jak lutować, żeby zapanować nad wszystkimi obrabianymi elementami. W podstawowym, najprostszym wariancie uchwyt zawiera elastyczną „gęsią szyję” z krokodylkami. Rozbudowane modele ponadto mają zintegrowaną lupę, uchwyt na lutownicę i czyścik, a nawet podświetlenie.
- Spoiwo – o konieczności jego użycia wiesz już z poprzednich części artykułu. Wybierając je, zawsze zwracaj uwagę na temperaturę topnienia. W różnych rodzajach spoiwa może być ona inna. Produkt kupisz w formie drutu nawiniętego na szpulkę lub w kształcie laski.
- Kalafonia – to pojęcie, z którym zapewne spotkasz się, szukając informacji o spoiwie. W kolejnej części artykułu wyjaśniamy dokładnie, czym ona jest.
Do czego służy kalafonia?
Kalafonia to nic innego jak uzyskiwana z naturalnych źródeł miękka żywica. Jest półprzezroczysta, ma zwykle żółty lub brązowawy kolor. Występuje w formie ciała stałego lub pasty. Choć wykorzystuje się ją do rozmaitych celów, w elektronice słynie z przyspieszania i ułatwiania lutowania. Ponadto spoiny charakteryzują się mniejszą podatnością na pękanie i gładką, połyskującą powierzchnią.
Zastanawiasz się, jak używać kalafonii? Kiedy oblewasz nią łączone miejsce, zabezpiecza je przed utlenianiem. Lutowanie przebiega w wysokiej temperaturze, zatem utlenianie zachodzi bardzo szybko. Kalafonia pozwala spowolnić reakcję, co sprawia, że roztopione spoiwo wnika w metal (jeszcze przed jego utlenieniem). Pamiętaj, żeby przed zastosowaniem kalafonii oczyścić obrabiane elementy z patyny, rdzy i pozostałości starego spoiwa.
Czy jest możliwe lutowanie bez kalafonii?
Teoretycznie lutowanie bez kalafonii jest możliwe, ale doświadczeni fachowcy zwykle nie wyobrażają sobie lutowania bez niej. Bywa, że cyna zawiera już kalafonię (topnik). Jednak do uzyskania spoiny wysokiej jakości taki produkt może okazać się niewystarczający.
Jak lutować – podsumowanie
Lutowanie nie należy do skomplikowanych czynności. Niemniej wymaga dwóch rzeczy – nieco wprawy i sporej precyzji. Podstawowe znaczenie ma dla niego temperatura. Właśnie od niej zależy specyfika pracy związana z lutowaniem twardym lub miękkim.
Lutowanie elektroniki, a także przewodów, ledów i innych elementów wymaga przeznaczonego do tego sprzętu. Choć istnieją porady „jak lutować bez lutownicy”, to my zdecydowanie zalecamy zakup choćby najprostszej, transformatorowej lub grzałkowej. Oczywiście, jeśli lutowanie zajmuje ważne miejsce w Twoim warsztacie, najlepszym rozwiązaniem okaże się bardziej rozbudowana stacja lutownicza.
Ostatni punkt stanowią akcesoria. Bez nich nawet lutowanie słuchawek stanie się trudniejsze i mniej precyzyjne. Samo spoiwo i kalafonia nie wystarczą. O praktyczności np. czyścika do grotów, uchwytu tzw. trzeciej ręki czy lampy ze szkłem powiększającym z pewnością przekonasz się z własnego doświadczenia.


Share